Showing posts with label tutorial. Show all posts

Tuesday, April 12, 2016

Bell Flower Earrings

Week 15 of Year of Jewelry is a sweet pair of earrings. Bell flowers made form little brass bells.

Wind Dancer Studios; Bell Flower Earrings


Once upon a time I used to get daily e-mails for the Beading Gem. I’m not entirely sure why I don’t anymore upgraded servers on her end or mine, I dunno. I don’t seem to get a lot of mail that I used to…. Anyway one of the last e-mails I remember was for a tutorial for some really sweet earrings. The original poster had tried to use bells but didn’t quite like how they turned out so she had dissected the bells to create her own. I actually liked how the bells looked so I stuck to that part of the tutorial in making my own. I may try the rest of it some day in the future but for now I’m happy with these.


Thanks for stopping by!

We’ll see you next time~

Tuesday, February 16, 2016

A Quick Tutorial on Adding Patina to a Copper Ball Chain

I love the warmth of raw copper, it’s very similar to Rose Gold probably because Rose Gold picks up it’s rosiness from Copper :) and with todays  Gold prices copper is VERY affordable. Put a little patina on it and it takes on a calm earthy feel, put a lot of color on it and it takes on the appearance of a relic.  

Today’s blog post shows you how I added a little depth to the copper ball chain I used in last weeks Year of Jewelry post “Charmed I’m Sure”


1: Liver of Sulphur works best if warmed first so I always start by warming some water in the microwave.
2: The metal will take the color faster if it’s clean and warm too so before I add the LOS I drop the chain in the hot water while getting everything ready.


3: Pull the chain out of the water and add a drop or two of the LOS gel.


4: Give it a quick mix and drop your chain back in the LOS mixture. 
It won’t take long at all for the color to appear. 


5: Pull it out to check the color and dunk a time or two, or until you’re happy with it.


6: Rinse it off and buff back the high spots with a little steel wool - I’m using an SOS pad, but you can also use ScotchBrite or 3M products.
If you take it too far back, give it another dunk or two and and start again. Sometimes the color comes up first try and sometimes it takes a couple rounds until you’ve got the depth you’re looking for. 


That’s all there is to it, it’s really very simple. You can play with it some and get a rainbow of colors. I’ve found if you heat your metal and make a weak solution the colors are easier to manage, make sure you seal them once you’re happy though as the patina will continue to darken naturally otherwise.


Week 7 of Year of Jewelry: 


Still on a feather kick with a simple wrap bracelet this week. Turquoise from my favorite purveyor of turquoise MagPie Gemstones, more from my BFF  Moonie, and Coral from House of Gems. Silver hearts and feathers are repurposed from an estate sale find and are most likely plated or “toned”,  vintage seeds (I can verify their age as I bought them new lol) as well as new. A sweet look for an easy on easy off wrap.

Thanks for stopping by!
Dana


Tuesday, November 10, 2015

Hand Crafted Holidays 2015 : The Hand Crafted Kitchen

MagPie Approved: Wind Dancer Studios, Woven Ribbon Heart
A Little bit of a Woven Ribbon Heart

If home is where the heart is, the kitchen is the heart of the home, and hand crafted is heart crafted, it just makes sense that this years Hand Crafted Holiday series be a Hand Crafted Kitchen.

The countdown to the holidays has begun! Thanksgiving is in just three short weeks and Christmas follows (as usual lol) just four weeks behind.

This year I’m starting the series off with Hand Crafted Vanilla Extract. It may seem a bit early but  vanilla extract takes several weeks to make and I wanted to give you ample time should you choose to make it yourself.


If like me you love the smell and taste of real vanilla extract, you can imagine just how deliciously good a made with love batch tastes. We have a family member who makes it every year and mmmmm it’s good!

In the spirit of the holiday season I thought I’d share that home made goodness with you. 
I’ve found recipes and kits, bottling supplies, labels and ways to decorate your bottles so that they’re as unique as you are! And I’ve also found a wonderful new shop on Etsy that sells A Beautifully packaged extract that has been aged for an entire year. 


I found a recipe at Tidy Mom that looked super simple to follow: http://tidymom.net/2012/recipe-for-vanilla/

and another here: http://theimprovkitchen.blogspot.com/2011/12/worth-extra-step.html  and this one also includes Vanilla Sugar, imagine that on some Cinnamon toast, or Cinnamon Rolls! mmmhmmm 

I just got this e-mail from King Arthur Flour with a kit so you don't have to hunt down vanilla beans:


and another kit on Etsy https://www.etsy.com/listing/254560165/

If you prefer to use the recipes above and source the beans yourself, I've found some fun bottles for your finished product:

MagPie Approved: Pinterest find Apothecary Jar Supplies
Apothecary Jars
Available HERE

MagPie Approved: Etsy find Apothecary Jar Supplies
Brown Glass Jars
on Etsy


You could use the really pretty labels provided with the recipe above but I also found some really Great DIY labels over at http://www.thebudgetdecorator.com/diy-label-projects-and-free-printables/   you might like to try.

MagPie Approved: Pinterst find  DIY  Labels
DIY Labels found on
Budget Decorator
MagPie Approved: Pinterst find  DIY  Labels
DIY Labels found on
Budget Decorator


I poked around on Pinterest some more and found some great tutorials on decorating those bottles:

Step by Step Photo Tutorial
found on this BLOG

Bottles Etched Using Martha Stewart Doily Stencils


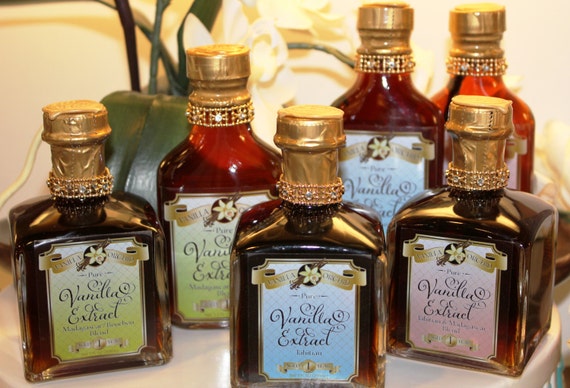
If after all of this, you'd prefer to purchase your Artisan Vanilla rather than make it I found a cute little shop on Etsy with some wonderfully packaged Vanilla.


Wind Dancer Studios: Etsy Find Artisan Vanilla
Artisan Vanilla Found on Etsy
HERE

LOVE this vintage Vanilla signage found on Etsy
HERE
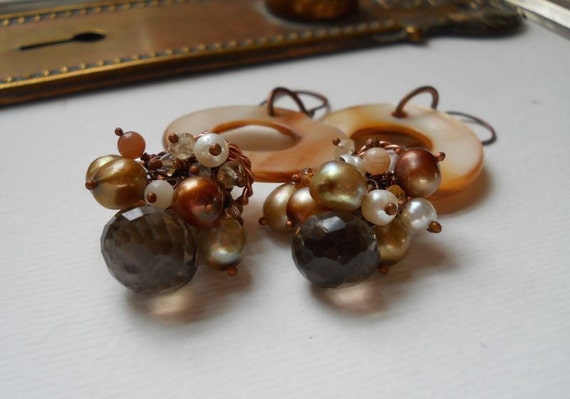
While I don't have any extract in my shop I do have some Smokey Quartz 
= Jewelry with gorgeous rich and smooth vanilla extract coloring =

MagPie Approved: Wind Dancer Studios Smokey Quartz Earrings
Found in my Etsy
HERE
MagPie Approved: Wind Dancer Studios, Smokey Quartz Earrings
Found in my Etsy
HERE


https://img1.etsystatic.com/039/0/5717654/il_570xN.625303869_guig.jpg
Found in my Etsy
HERE

The holidays are about sharing and caring, and I’d like very much to get the word out that hand made is heart made as is the holiday season. 

SO, If you like this post, and I hope you do! Please feel free to share it! Blog about it, Tweet it, Pin it, Instagram it and give it a shout out on FaceBook. Don’t forget to come back each week for another post in this years series: The Hand Crafted Kitchen


Thanks for stoppin by!
We'll See ya Next Week!

Tuesday, July 14, 2015

Left Handed Loop Tutorial

Loops and wrapped loops are something quite a few beginning jewelers struggle with. The headpins purchased at most craft departments are steel and don't bend easily, making them think they are doing something wrong or just aren't very good at jewelers making. A nice loop does take a little practice and armed with a little how to and the proper tools it can be done quite easily.

To get started you will need wire or purchased head pins and a pair of round nose pliers
http://www.firemountaingems.com/itemdetails/h203181tl

or forming pliers
http://www.firemountaingems.com/itemdetails/h203512tl

and a pair of chain nose pliers.
http://www.firemountaingems.com/itemdetails/h204666tl

flush cutter

and optional crimping plier


These days they have a one step looper tool -
http://www.bsueboutiques.com/product-p/looper01622.htm


but it won't make wrapped loops, those you still have to make yourself and I'm going to give you a quick tour of how I go about making them.

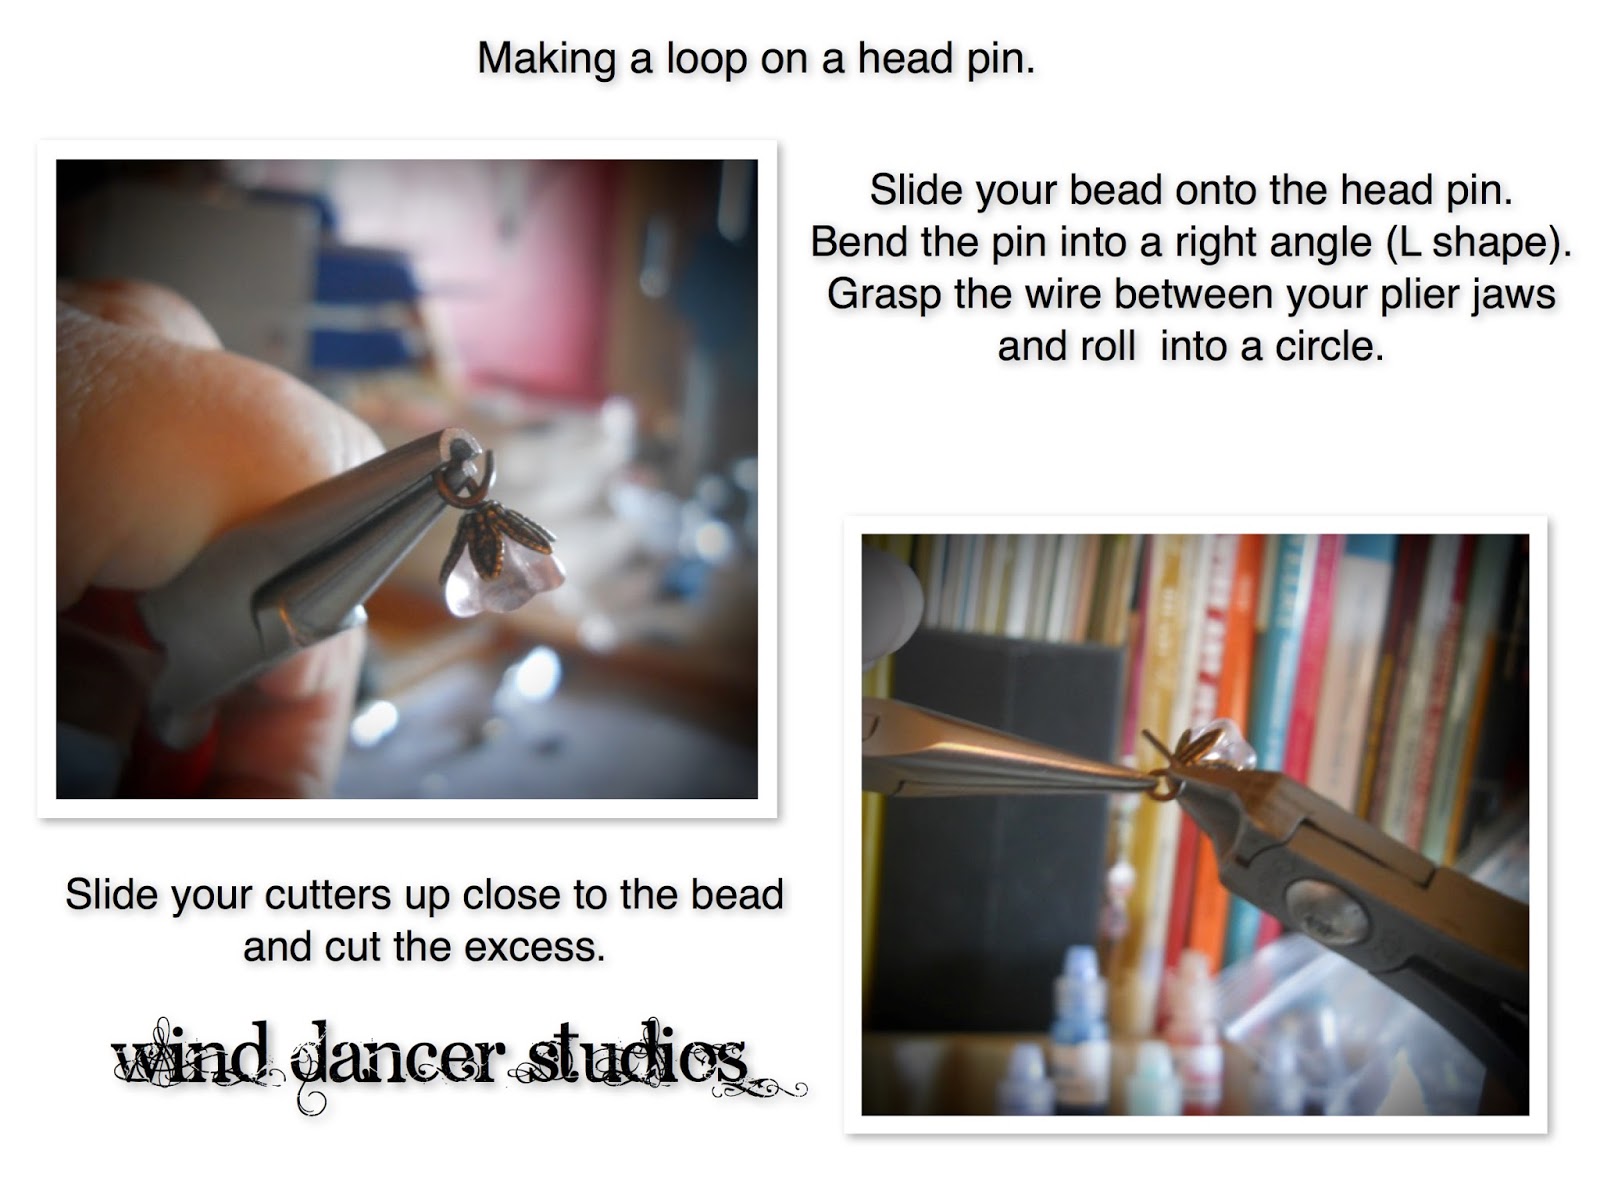
To make a simple loop drop a bead onto your head pin and using your thumb bend the wire over the top of the bead in an upside down L. The bead being on the straight portion. Grab the wire between the jaws of the pliers and roll.


Making a loop on a Head pin, WindDancer Studios, free tutorial
Using a head pin.


Continue rolling until it looks like a lollipop.
Trim the excess.

To make a link you'll do the same but loop both ends. Generally when making links I'll slide quite a few beads onto the wire and work from the roll. This saves time and wire.


Wind Dancer Studios, free tutorial, simple loop link
Using round nose pliers to make a simple loop link

Wind Dancer Studios, free tutorial, simple loop link
Using Forming Pliers to make a link.


To make a wrapped loop you'll do pretty much the same thing but you need to leave a space next to the bead for your wraps.

Wind Dancer Studios, free tutorial, wrapped loop link
Making a Wrapped Loop Link


This time we'll place our pliers next to the bead and rock it to the side. The tip of your plier leaves a little space between the bead and the bend.

Wrap the wire around the tips of your plier until you have your lollipop but don't cut the tail.

Grab the tail with your chain nose pliers and wrap it around the space beneath the loop. Wrap as straight across as you can and fill the space.

Trim the excess and tuck the end in close to the wraps with your chain nose pliers.

Sometimes wraps can be a little uneven or the tail just doesn't want to tuck all the way in.  A helpful hint in these cases is to use your crimping pliers and very gently squeeze around the wraps and tail end to even them out and tuck the tail.

Can you spot the wonky links?
Got going too fast on those....now I have to fix them.


The links I found for the pliers had great pictures that showed the pliers tips so you know what you're looking for. I also turned myself into a contortionist so you might have a better view of the plier tips as I worked. There are a full range of product price points and you should purchase what you are comfortable spending as you will get what you pay for when it comes to pliers. I have some really nice very expensive pliers that I absolutely love, I have some mid range pliers that are very nice and fit my hand beautifully and I have regular hardware store pliers that I've owned for many many years, they all do the job I want of them. Treat your toys and tools with respect and they'll last a long time.

I thought you might like also like to see a video of a right hander so you can see the motions. I often use both hands switching back and forth without thought so I thought this might help to see it both ways.


I hope you find this helpful or know of someone who might.

Thanks for stopping by!
We'll see you next time!

Tuesday, April 7, 2015

How to Make Ear Wires or How Lefties Make Them - Me Anyway

hand crafted hollow bead earrings by wind dancer studios on Etsy, ear wire tutorial
Hollow Bead Earrings by Wind Dancer Studios


There are lots of ways to make ear wires and I use several of those methods myself. This is my go to method - it’s very basic and assumes you have some knowledge of working with wire and don’t need me to tell you cutters cut people too, files ruin manicures, and hammers hurt when you smash a thumb or fingernail.

I made a pair of hollow beads for the Year of Jewelry project  and thought hey! why not share how I make the ear wires for these? If my fingers look a little dirty that would be why, that and the glitter nail polish lol So I just grabbed the camera and shot photos as I worked. 

DISCLAIMER!!! I AM A LEFTIE, I use both hands when making jewelry so I don’t always realize when things might look backwards to you - if it looks backwards just mirror it and it should work out just fine! If you’re a leftie HI! isn’t it nice to know there are more of us?!

OK Let’s get started!

Step 1) Cut two pieces of 20 ga wire two inches long.

wind dancer studios ear wire tutorial step 1
I use Tronex Razor Flush Cutters I heart my Tronex!


Step 2)  Debur your ends on both ends. You can use a bur cup, fish hook sharpener or a nail file. Just file them smooth, nothing worse than sharp wires poking you in the ears. (ok maybe a few things..but…)

wind dancer studios ear wire tutorial step 2
Deburring with a cup bur
got mine at Fire Mountain Gems

wind dancer studios ear wire tutorial step 2
Demurring with a nail file 180 grit


Step 3) Straighten and work harden your wires. You can use nylon jaw pliers for this or use a bench block but I like rolling the wire between the anvil and an altoids tin or the ruler, whichever is closest at hand. There’s no curve to the wire once you’re done and it has a slight spring to it.

wind dancer studios ear wire tutorial step 3
Don't you love my baby anvil! It's so tiny!
Hubs found this one at a yard sale, my other one is 15 lbs
cast and sits on my other desk.

wind dancer studios ear wire tutorial step 3
Roll wire between anvil and ruler to straighten and work harden.


Step 4) On one end of each wire form simple loops, this will be where you add your dangle etc.

wind dancer studios ear wire tutorial step 4
Form a simple loop on one end.

wind dancer studios ear wire tutorial step 4
Simple loops, I didn't center the loops but you could.


Step 5) Take your bail making pliers and wrap both wires around the larger barrel leaving the tail longer.
You can use wood dowelling, a sharpie or a pencil, anything smooth and round.

wind dancer studios ear wire tutorial step 5
Forming wires on bail making pliers - large barrel side.
These are Bead Smith pliers.

wind dancer studios ear wire tutorial step 5
Form both wires at once so they match.


Step 6) Most people stop there but I like to go one more and slide my wires onto the smaller barrel and tuck the dangle side in for a tighter curl.

wind dancer studios ear wire tutorial step 6
Slide both wires onto smaller barrel for a tighter curl on the backside.


Step 7) At this point you can slide a bead onto the wire if you want. I like to add a little matching detail to my wire so they match my earrings.

wind dancer studios ear wire tutorial step 7
Adding a bead for color.


Step 8) Now grab the wire just behind the bead and give a little bend to help hold the bead in place. This also balances the wire a little bit so your dangles hang straight down.

wind dancer studios ear wire tutorial step 8
Securing the bead in place.
I'm using Wubbers Chain Nose pliers.


Step 9) Place your ear wire on the anvil or bench block and give the backside of the curve a little tap. This hardens the curve and helps it keep its shape. Some people don’t like the flattened wire, especially with a heavy earring, to keep the wire round use a rubber mallet or a leather mallet instead. Both will harden your wire without distorting it’s shape.

wind dancer studios ear wire tutorial step 9
Hardening the back edge. I'm using a finish hammer,
it has a slightly domed smooth face with no hard edges.
Sometimes I steal the hubs MAC chasing hammer
for auto body work, it has a much smaller head, great for
precision work!


Step 10)All that’s left is to add your dangle and voila you have just made your own ear wires.

wind dancer studios ear wire tutorial step 10
TaDaaa!
hand crafted hollow bead earrings by wind dancer studios on Etsy
Hollow Bead Earrings by Wind Dancer Studios


Please excuse the stacked trays in the background, I just realized they were there lol I was using those to keep my components together as I worked on my Muchas Musings Lines. They allowed me to keep components with the sketches so I wasn't constantly looking for where they went. Take out tubs are AWESOME for this, lids and see through.

I hope you enjoyed seeing me make these and if you did please leave a comment. 
Comments will encourage me to retake those photos for the rose tutorial......

Thanks for stopping by!
We'll see you next time!


Tuesday, September 30, 2014

Trees and Branches

It seems I've been on something of a tree and branch kick lately. Must be wishing for the cooler temps of Autumn and the colors it brings as I seem to have also been in something of an orange mood too. More of a pinky/coral orange than a pumpkin orange but still an orange.

pearl & coral necklace with copper cherry blossoms
FW Pearls, Peach Coral & Copper Necklace
Instead of a full on Tree of Life this time I opted for a branch of twisted copper cherry blossoms.
This one is something of a convertible, being wearable at different lengths. The vintage style hook closure allows for an 18 inch length when hooked at the first cap, a 22 inch length when hooked at the flower and a 25 inch length when hooked at the end of the extender. I love the soft colors of the coral I got from House of Gems and how sweet it looks combined with the FW pearls I picked up from Fire Mountain Gems recently during their Dutch auction sale. Perfect as we head into fall and will still be awfully sweet when he head into spring.

copper end cone cut lines


I took pics as I made this one thinking I might do something of a tutorial. Then I found this paper plate cookie basket tutorial by One Good Thing by Jillee and darn if it wasn't exactly what I did to make my end "cones" well minus the tape!

One Good Thing by Jillee
*I punched mine out of copper and ran them through the Big Kick to match the cherry blossom focal first.
*I used my flat nosed pliers for spacing and marked the back side with a sharpie so I knew where to cut to. 
*Punched a hole dead center then followed the fold and cut pattern to make the box. 
*Instead of cookies we have crimped bead ends on an eye pin inside a nice neat little open ended copper box that matches the focal, giving it a special one of a kind touch. 

Isn't it fun to think outside of the "box"?! These can be made to any size you need. I love taking techniques I learned from other crafts growing up and applying them to jewelry.  This will even work for a flower petal bead cap if you use a smaller circle or a larger bead. Just be sure to file those edges and corners, they can be a little sharp if you don't.


Thanks for stoppin by!
Feel free to post any "Out of the Box" techniques you use in the comments.
See ya next time!